


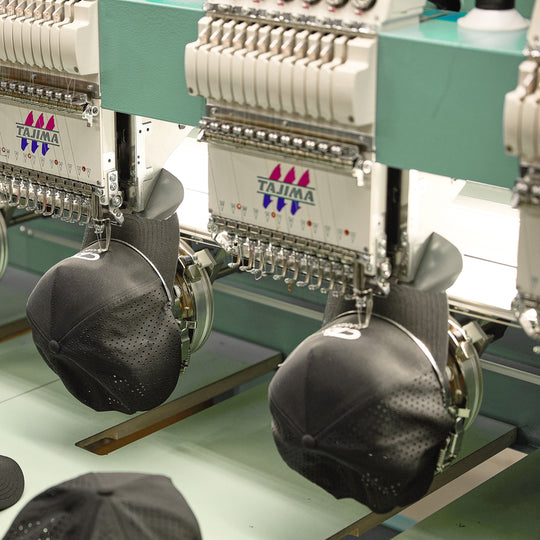










Professional embroidery requires more than a reliable machine. The finished result depends on the thread, needle, stabilizer, bobbin, hoop, digitized artwork, fabric, and machine settings working together.
Using the wrong combination can lead to thread breaks, distorted designs, puckering, uneven lettering, needle damage, and wasted products. The right supplies improve stitch quality, production efficiency, and consistency across both small and large orders.
Whether you are starting an embroidery business or expanding an established decoration shop, this guide explains how to choose the essential supplies for professional machine embroidery.
Why the Right Embroidery Supplies Matter
Every fabric responds differently to needle penetration, thread tension, hooping pressure, and stitch density. A stable woven material may require less support than a lightweight knit, while a dense logo may require different settings from a small monogram.
Choosing suitable supplies can help you:
- Reduce thread breaks and machine downtime
- Improve small-text clarity
- Prevent puckering and fabric distortion
- Maintain consistent design placement
- Support dense or detailed embroidery
- Reduce rejected products and rework
- Improve consistency across repeat orders
No single thread, needle, or stabilizer works perfectly for every project. Supplies should be selected according to the fabric, artwork, stitch density, product use, and embroidery machine.

1. Choose the Right Embroidery Thread
Embroidery thread affects the strength, color, shine, texture, and overall appearance of a design. The best option depends on the product’s intended use, fabric, washing requirements, and desired finish.
Polyester Thread
Polyester is one of the most practical choices for commercial embroidery. It offers good strength, color consistency, and resistance to frequent use and washing.

Polyester thread is suitable for:
- Corporate uniforms
- Team apparel
- Workwear
- Bags and accessories
- Promotional merchandise
- Products requiring regular washing
- High-volume production
It is often selected as an all-purpose commercial embroidery thread because it balances durability, appearance, availability, and cost.
Rayon Thread
Rayon thread produces a smooth surface and attractive shine. It is frequently used for fashion, lifestyle, monogramming, and decorative applications.

Rayon may be suitable for:
- Retail apparel
- Fashion embroidery
- Decorative monograms
- Detailed artwork
- Premium merchandise
- Products requiring a softer visual finish
However, rayon may be less resistant to abrasion and harsh laundering than quality polyester thread. The intended use and care requirements should be reviewed before selecting it.
Specialty Thread
Specialty thread can add texture, visibility, or a distinctive finish to embroidery.

Common options include:
- Metallic thread
- Matte-finish thread
- Glow-in-the-dark thread
- Reflective thread
- Fire-resistant thread
- Recycled polyester thread
- Variegated thread
Specialty thread may require a different needle, lower machine speed, reduced tension, or adjustments to the embroidery file. Always test it on the actual fabric before starting full production.
Understanding Thread Weight
Thread weight affects the thickness and appearance of stitched lines. In common embroidery-thread systems, a smaller weight number generally indicates a thicker thread, while a larger number indicates a finer thread.
Forty-weight thread is widely used for general machine embroidery because it works with many standard digitized designs.
Finer thread can help reproduce small text and detailed elements. Thicker thread can create bolder lines and faster coverage, but the embroidery file must be prepared accordingly.
Changing the thread weight without modifying the design can affect:
- Stitch density
- Fabric coverage
- Thread tension
- Small details
- Finished dimensions
- Production performance
The digitizer should know which thread type and weight will be used before preparing the final file.
Use a Physical Thread Color Card
Colors displayed on a screen are not always accurate. Lighting, monitor settings, fabric color, and thread shine can change how a color appears.
A physical thread card helps decorators:
- Compare colors accurately
- Match brand guidelines
- Select tonal or contrasting combinations
- Record specifications for repeat orders
- Present realistic options to customers
For important corporate or brand colors, approve an actual stitched sample instead of relying only on a digital mockup.

2. Select the Correct Stabilizer or Backing
Stabilizer supports the fabric while the design is being stitched. It controls movement, reduces distortion, and helps the finished embroidery maintain its intended shape.
The correct stabilizer depends on:
- Fabric weight
- Material stretch
- Stitch count
- Design size
- Embroidery density
- Number of fabric layers
- Washing requirements
- Desired interior finish

Tear-Away Stabilizer
Tear-away stabilizer is generally used on stable woven fabrics. After embroidery, the excess material can be removed from around the design.
It may work well for:
- Cotton twill
- Denim
- Canvas
- Aprons
- Bags
- Jackets
- Stable uniform fabrics
- Simple or medium-density designs
Choose a stabilizer strong enough to support the design without making the finished product unnecessarily stiff.

Cutaway Stabilizer
Cutaway stabilizer remains behind the design after production. It provides longer-lasting support and is particularly useful for soft, flexible, lightweight, or stretchy materials.
It is commonly used for:
- T-shirts
- Polo shirts
- Knitwear
- Sweatshirts
- Stretch fabrics
- Lightweight performance apparel
- High-density embroidery
- Products expected to be washed frequently
Trim the remaining stabilizer carefully so the reverse side looks clean and feels comfortable.

Water-Soluble Topping
Water-soluble topping is placed on the front of textured fabrics. It helps prevent stitches from sinking into the material.
It is especially useful for:
- Fleece
- Terry cloth
- Towels
- Thick knits
- Velvet
- High-pile fabrics
- Other textured materials
Topping complements the stabilizer behind the fabric; it does not replace it.

Heat-Away Stabilizer
Heat-away stabilizer can be useful when water is unsuitable for the product or when small areas of stabilizer would be difficult to remove manually.
Before using it, confirm that the fabric, thread, decoration, and product can tolerate the required temperature.
Match the Stabilizer Weight to the Design
A small, low-density logo usually needs less support than a large design containing extensive fill stitches.
Too little stabilization may cause:
- Puckering
- Fabric movement
- Poor registration
- Distorted lettering
- Uneven outlines
Too much stabilization can make the product stiff, uncomfortable, or difficult to finish.
Test different stabilizer types and weights to determine the minimum support required for a clean result.
3. Choose the Proper Embroidery Needle
Needle selection affects fabric penetration, thread performance, stitch formation, and material damage.

Important factors include:
- Needle size
- Point type
- Eye size
- Surface coating
- Thread compatibility
- Fabric construction
- Embroidery density
Sharp-point needles may be appropriate for tightly woven fabrics such as denim, canvas, and twill. Ballpoint needles may work better on selected knit fabrics because they are designed to pass between loops rather than cut through them.
Metallic and other specialty threads may require a needle with a larger eye to reduce friction.
Always follow the embroidery machine and needle manufacturer’s recommendations. Bent, dull, or damaged needles should be replaced immediately because they can cause:
- Skipped stitches
- Thread breaks
- Fabric damage
- Needle holes
- Poor registration
- Inconsistent results
Maintain a replacement schedule instead of waiting for a needle to fail during production.
4. Use Quality Bobbins
Bobbin thread works with the upper thread to form each stitch. Inconsistent bobbins can cause tension changes, uneven stitching, thread nests, and machine stoppages.

Pre-wound bobbins can improve production efficiency by providing:
- Consistent thread quantity
- More stable tension
- Faster replacement
- Less machine downtime
- Reduced need for manual winding
Black and white bobbins cover many common applications. Choose a color that keeps the reverse side neat and does not show through the finished design.
Before ordering in bulk, confirm that the bobbin size, style, and material are compatible with the embroidery machine.
5. Select a Suitable Hoop or Frame
The hoop holds the fabric and stabilizer during embroidery. Proper hooping keeps the material stable while allowing the machine to stitch accurately.

A suitable hooping system should:
- Match the embroidery machine
- Hold the product securely
- Control fabric movement
- Maintain consistent placement
- Avoid stretching or damaging the material
- Provide enough space for the intended design
Hooping Best Practices
Before starting:
- Select a hoop size close to the design dimensions.
- Place the stabilizer smoothly behind the fabric.
- Align the product using the required center points.
- Keep the fabric flat without overstretching it.
- Tighten the hoop enough to prevent movement.
- Check that seams, zippers, buttons, and other obstacles are clear.
- Confirm the design orientation before attaching the hoop to the machine.
Overstretching a knit fabric can cause the design to contract and pucker after it is removed from the hoop.
Magnetic Hoops
Magnetic hoops can be useful for thick, delicate, or difficult-to-hoop products. They apply more even pressure and may reduce visible hoop marks.
However, the magnetic system must be compatible with the embroidery machine and used according to the manufacturer’s safety instructions.
Hooping Aids and Placement Tools
Templates, alignment grids, rulers, placement guides, and laser-positioning systems can improve consistency across multiple items.
For repeat orders, document the distance between the design and relevant product reference points.
6. Essential Embroidery Finishing & Maintenance Tools
Finishing and maintenance tools are essential for professional machine embroidery. They help remove excess threads, correct stitching mistakes, and keep embroidery machines running smoothly.
Thread Snips
Thread snips are small, sharp cutting tools designed for trimming loose threads and jump stitches after embroidery.
They are especially useful for:
- Trimming excess embroidery threads
- Removing jump stitches between design elements
- Cleaning up small lettering and detailed logos
- Improving the finished appearance of embroidered products
Pro Tip: Choose lightweight, sharp thread snips for precise trimming without damaging the fabric or surrounding stitches.

Seam Ripper
A seam ripper is a useful tool for removing unwanted stitches and correcting minor embroidery mistakes.
It can help with:
- Removing incorrect or damaged stitches
- Correcting small embroidery errors
- Removing unwanted seams or thread sections
- Preparing products for embroidery repairs
Pro Tip: Use a seam ripper carefully to avoid cutting or damaging the fabric. Dense embroidery may require additional stitch-removal tools.
Embroidery Cleaning Brush
An embroidery cleaning brush helps remove lint, thread fragments, and dust from embroidery equipment.
Regular cleaning can help:
- Remove lint around the bobbin area
- Keep the needle plate and accessible machine parts clean
- Reduce buildup of loose thread fibers
- Maintain consistent machine performance

Pro Tip: Turn off the embroidery machine before cleaning and follow the manufacturer's maintenance instructions.
Keeping these simple tools within reach can improve finishing efficiency, maintain a cleaner workspace, and support consistent embroidery quality.
6. Prepare the Artwork for Embroidery
Artwork that looks good on a screen may not translate directly into embroidery. The design must be digitized into stitch instructions that the machine can follow.
Embroidery digitizing determines:
- Stitch type
- Stitch direction
- Underlay
- Stitch density
- Pull compensation
- Color sequence
- Start and stop points
- Trim locations
Consider Minimum Detail Requirements
Very small text, thin outlines, tight spacing, and complex gradients may not reproduce clearly.
For better results:
- Simplify unnecessary details
- Enlarge very small text
- Increase spacing between letters
- Remove extremely thin lines
- Limit unnecessary color changes
- Reduce dense fills on lightweight fabrics
- Use an alternative decoration method for overly detailed artwork
Minimum line and text dimensions depend on the thread, fabric, font, stitch type, and machine. A physical test is more reliable than applying one fixed measurement to every design.
Use the Right Stitch Type
Common embroidery stitch types include:
- Satin stitch: Suitable for lettering, borders, and narrow design elements
- Fill stitch: Used for larger solid areas
- Running stitch: Suitable for fine outlines and lightweight details
- Underlay stitch: Creates a stable foundation beneath the visible embroidery
The digitizer should select stitch types according to the dimensions, fabric, and desired appearance.
Account for Pull and Push
Embroidery stitches naturally pull fabric inward and may push the design outward in other directions. Pull compensation and suitable underlay can help the finished design retain the intended shape.
Ignoring fabric movement may result in:
- Gaps between colors
- Misaligned outlines
- Distorted circles
- Uneven lettering
- Incorrect finished dimensions
7. Match the Embroidery Setup to the Fabric
Different fabrics respond differently to needle penetration, hooping pressure, tension, and dense stitching.
| Material | Embroidery considerations |
|---|---|
| Cotton twill | Stable and versatile; suitable for many standard designs |
| Denim | Strong fabric that can support bold embroidery |
| Canvas | Durable but may require a suitable sharp needle |
| T-shirt jersey | Stretchy material that usually requires cutaway stabilizer |
| Polo knit | Requires stretch control and careful tension adjustment |
| Fleece | May benefit from topping to keep stitches above the surface |
| Terry cloth | Usually requires topping and suitable backing |
| Performance polyester | Test for puckering, needle marks and heat sensitivity |
| Nylon | Lightweight fabric may require lower density and careful stabilization |
| Corduroy | Textured surface may require topping and simplified details |
| Wool or wool blend | Test for compression, texture and care requirements |
| Leather or faux leather | Avoid excessive needle penetration and dense stitching |
Always test the exact material and color. Different fabric weights, coatings, dye lots, finishes, and internal constructions can produce different results even when the stated fiber composition is identical.
8. Test the Machine Settings
Machine tension and speed should be adjusted according to the fabric, thread, needle, stabilizer, and artwork.
Before production, check:
- Upper-thread tension
- Bobbin tension
- Machine speed
- Needle condition
- Presser-foot clearance
- Hoop alignment
- Thread path
- Design orientation
- Color sequence
- Trimming and tie-offs
Reducing machine speed may improve results with:
- Thick seams
- Metallic or specialty thread
- Dense designs
- Heavy fabrics
- Delicate materials
- Frequent color changes
Keep a record of successful combinations. Documenting the thread, needle, stabilizer, machine settings, fabric, and embroidery file makes repeat orders easier to reproduce.
9. Run a Sample Before Bulk Production
A digital mockup shows general placement and color, but it cannot fully predict how the embroidery will interact with the actual material.
A physical sample allows you to evaluate:
- Design size
- Design position
- Thread colors
- Small-text clarity
- Stitch density
- Fabric puckering
- Color registration
- Material distortion
- Stabilizer appearance
- Comfort against the skin
Check the sample from the front, reverse side, and normal viewing distance. Wash-test it when the final product will require regular laundering.
Approve the physical result before starting full production.
10. Build an Embroidery Quality-Control Checklist
Inspect production regularly rather than waiting until the complete order has been finished.
Before Production
- Confirm the correct product, material, color, and quantity
- Check the approved embroidery file
- Verify thread colors
- Confirm design size and placement
- Inspect the needles and machine condition
- Prepare the correct stabilizer and bobbins
- Approve a production sample
During Production
- Monitor upper and bobbin tension
- Check registration between colors
- Inspect for skipped stitches
- Confirm the product remains secure in the hoop
- Watch for puckering or fabric distortion
- Replace damaged needles
- Remove defective items from the production line
After Production
- Trim loose threads
- Remove excess stabilizer carefully
- Check design alignment
- Inspect the product for marks or damage
- Confirm quantities
- Follow applicable finishing instructions
- Pack products to prevent creasing or damage
11. How to Choose an Embroidery-Supply Vendor
Price is important, but reliability and consistency often have a greater impact on long-term production costs.
Evaluate suppliers based on:
- Product quality
- Color consistency
- Inventory availability
- Machine compatibility
- Technical specifications
- Bulk pricing
- Sample availability
- Shipping speed
- Customer support
- Repeat-order reliability
A lower-priced supply can become expensive if it causes thread breaks, inconsistent tension, rejected products, or production delays.
Maintaining approved alternatives for frequently used supplies can also reduce disruption when the preferred product is temporarily unavailable.
Essential Embroidery Supplies Checklist
A well-equipped embroidery workspace may include:
- General-purpose polyester thread
- Decorative rayon thread
- Selected specialty threads
- Physical thread color cards
- Tear-away stabilizer
- Cutaway stabilizer
- Water-soluble topping
- Appropriate embroidery needles
- Pre-wound bobbins
- Hoops in several sizes
- Magnetic hoops when required
- Placement templates and rulers
- Small scissors and thread snips
- Tweezers
- Seam-removal tools
- Temporary fabric adhesive when appropriate
- Cleaning and machine-maintenance supplies
- Sample fabrics for testing
- Production and quality-control forms
The exact inventory should reflect the products, fabrics, decoration styles, and order volumes handled by the business.
Frequently Asked Questions
What embroidery thread is best for general use?
Quality polyester thread is a dependable option for many commercial embroidery projects because it provides strength, consistent color, and good resistance to frequent use. Rayon can provide additional shine for fashion and decorative applications.
What thread weight is commonly used for machine embroidery?
Forty-weight thread is commonly used for general machine embroidery. The embroidery file, needle, tension, and stitch density should still be prepared for the selected thread.
What stabilizer should I use for embroidery?
Stable woven fabrics often work well with tear-away stabilizer, while lightweight, stretchy, or frequently washed products may require cutaway support. Textured surfaces may also need water-soluble topping.
Why does embroidery pucker?
Puckering may be caused by insufficient stabilization, excessive stitch density, incorrect tension, unsuitable digitizing, poor hooping, or a mismatch between the design and fabric.
Why does embroidery thread keep breaking?
Common causes include incorrect tension, a damaged needle, poor-quality thread, excessive machine speed, an unsuitable needle size, an incorrect thread path, or a design with excessive density.
Should I use pre-wound bobbins?
Pre-wound bobbins can improve consistency and reduce production downtime. Confirm that their size and type are compatible with the embroidery machine.
How do I prevent small embroidered text from becoming unreadable?
Use a clear font, increase letter size and spacing, avoid excessively thin strokes, select suitable thread, and test the design on the actual fabric.
Should I approve a sample before bulk embroidery?
Yes. A physical sample helps confirm thread colors, design dimensions, placement, stitch quality, fabric response, and the finished appearance before full production.
Final Thoughts
Professional embroidery depends on the complete production system rather than one individual supply. Thread, needles, stabilizer, bobbins, hoops, digitized files, fabrics, and machine settings must work together.
Select supplies according to the material and design, test the complete setup before bulk production, and document successful settings for future orders. Quality should also be checked throughout production rather than only after the order is finished.
With suitable materials, careful preparation, and consistent quality control, embroidery businesses can reduce waste, improve efficiency, and deliver professional products that accurately represent their customers’ designs and brands.