
Hats and caps are fantastic accessories that can complete any outfit. But over time, they naturally pick up dust, sweat, and grime, which can make them look worn out and less appealing. Regular and correct cleaning is key to keeping your favorite headwear looking fresh and new, and to extending its life. This guide will walk you through the proper methods for various hat types, ensuring your caps stay in top shape.
I. Essential Steps Before You Begin (Universal Tips)
Before you dive into cleaning, these crucial steps apply to almost all hats:
-
A. Check the Care Label: Your Golden Rule The first and most important step is always to check the care label. This small tag provides vital information about the hat's material composition (like cotton, wool, polyester, or a blend) and specific washing instructions from the manufacturer. If there's no label, it's best to err on the side of caution and opt for the gentlest cleaning method, such as spot cleaning or hand washing with cool water.
-
B. Test for Colorfastness To prevent any unfortunate dye bleed, it's wise to perform a quick colorfastness test. Dampen a small, inconspicuous area of the hat (like the inside of the sweatband or under the brim) with a little water and mild detergent. Gently blot it with a clean white cloth. If any color transfers to the cloth, avoid using water on the hat and consider professional cleaning or very careful spot cleaning only.
-
C. Remove Loose Dirt and Debris Before wet cleaning, always remove any loose dust, dirt, pet hair, or lint. You can do this by:
-
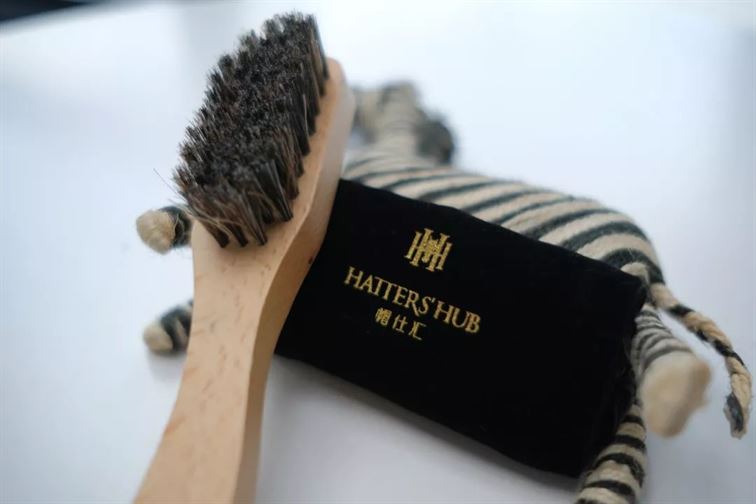
Gently brushing the hat with a soft-bristled brush (like a horsehair brush or a soft clothing brush). Regularly brushing your hats can significantly prolong the time between deep cleans.
-
Using a lint roller or even wide adhesive tape (wrapped around your fingers, sticky side out) to gently pick up surface dust and particles, especially on materials like wool where washing isn't recommended. Remember to be gentle to avoid damaging the hat's structure.
-
-
D. Understand the "No Machine Wash" Rule (Mostly) For most hats, particularly those with structured brims or delicate materials, machine washing is generally not recommended. The agitation and high heat of a washing machine can easily damage the hat's shape, shrink the fabric, or warp the brim. Hand washing offers much more control and is safer for preserving your hat's integrity.

II. Cleaning Methods for Different Hat Types
The material of your hat dictates the best cleaning approach.
-
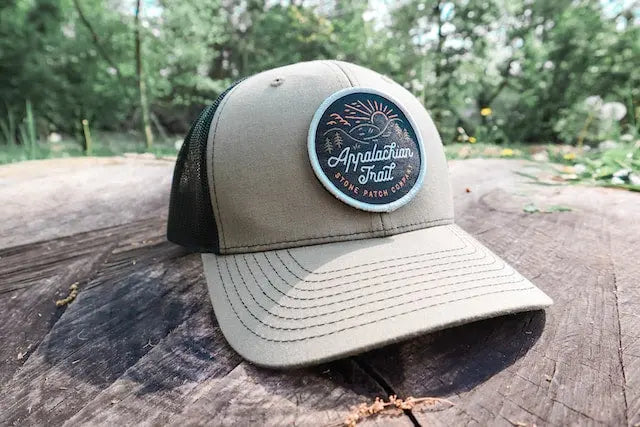
A. Baseball Caps (Cotton, Polyester, Blends): These are the most common and often the easiest to clean. If your hats are dirty like this, let me show you the best way to clean that up.
-
1. Pre-treat with Vinegar: The first step is to pre-treat the hat with some white vinegar. This works incredibly well because vinegar does an excellent job dissolving the salt rings and buildup that you typically get from sweating in your favorite hat. To apply this, just spray down the hat, paying special attention to those areas with really bad salt buildup.
-
Important Note on Fading: You might notice some fading or bleaching in areas with heavy sweat buildup. Unfortunately, sweat is very acidic, and over time, that acid can break down the dyes in the hat, causing permanent discoloration. While this cleaning process will get rid of all the sweat and grime, you might still have some permanent fading or discoloring on the hat itself. The best way to prevent this is simply to clean your hat more often!
-
Vinegar for Spot Cleaning: Vinegar is also a great option for small spot cleaning. Just spray your towel with vinegar, dab the spot, then rinse with a damp microfiber cloth.
-
-
2. Gently Scrub: Now that you've pre-treated the hat with vinegar (let it sit for about 5 minutes), it's time to gently scrub. Something important to keep in mind is that you don't want to scrub too hard, as that can loosen up some of the threads and fibers. We want to keep those as intact and looking good as possible.
Choose a soft-bristled brush for cleaning. Many hats are made with materials that can fray from hard scrubbing. I like to use either a toothbrush or a handy vegetable brush. When scrubbing, pay special attention to those areas that were really bad; even if the cleaner made them disappear a little, you can often still see some of the white salt poking through. Also, always keep the sweatband in mind – it gets very dirty! Give this area a good, deep scrub to start loosening that salt. The vinegar pre-treatment specifically targets those salt rings, helping you fully remove them from the fabric.
-
-
3. Hand Washing (Recommended for Best Results): Now that the hats are nice and pre-treated with the vinegar and scrubbed, it's time to wash them. There are a lot of different ways you can do this – you can throw it in the washing machine, or even put it in the dishwasher (a very popular hack). However, in my experience, I prefer to wash my hats by hand.
Anytime you put them in a washing machine or even a dishwasher, you run the risk of them losing their fit or structure, or even permanently damaging the hat. Excessive heat or pressure can damage the material or warp the brim of your hat! Unfortunately, they're often never the same after that.
To hand wash:
-
Grab a tub and fill it with about 2 gallons of warm water.
-
For a cleaner, you can either use Dawn dish soap or my preferred method, some Tide Free and Gentle laundry detergent. You only need about a tablespoon. Add this to the water and mix it up.
-
Take your hats and soak them in the mixture. Let them sit for anywhere from 15 to 30 minutes to let the cleaner do its thing. You'll definitely see some dirty water, which is satisfying!
-
Pro Tip: When soaking items that tend to float, just grab a glass container, fill it with water, and place it on top to keep your hats submerged so the cleaner can work effectively.
-
-
4. Detail Scrub (Optional but Recommended): After they've been soaking for about 20 minutes, you can tell by the water that the dirt and grime are definitely coming out – this water gets pretty gross! Now's a good time to grab your toothbrush and a little more laundry soap, and do a quick detail scrub on a few of the areas, especially the sweatband, to get rid of any remaining dirt that might be on the surface.
-
5. Rinse: Now that the hats are nice and scrubbed up, just head over to the sink and give them a good rinse to get rid of any soap or anything that might be left inside. Another reason I like hand washing my hats so much is just looking at this water – it's so satisfying how much dirt we pulled out of those hats!
-
6. Drying Process: Now that the hats are nice and rinsed off, it's time to get them dry. This is probably one of the most important steps, because you want to dry them in a way where you're not going to lose the structure of the hat.
-
For structured hats (like baseball caps):
-
Grab a cup and a bowl (the more round the bowl, the better, so it can contour the fit of the hat).
-
Place a microfiber towel (or any towel that can suck the moisture out of the wet hat) over the bowl.
-
Very carefully, fit the hat over the bowl and the microfiber towel, making sure not to stretch it out too much. The towel will help it stay and keep its structure as it dries.
-
Place another microfiber towel over the top of the hat to pull out more moisture, helping it dry much faster. "Wicking" draws dirt to the fabric's surface while drying. Placing a towel on top transfers any remaining soil from your hat to the towel.
-
-
For unstructured hats (like beanies or knit caps):
-
Just ball up two microfiber towels and push them into the inside of the hat to help it retain its shape while drying.
-
Then, just place another microfiber towel over the top.
-
Let these dry; it'll probably take about an hour or two. Avoid direct sunlight or heat, as this can cause shrinking or fading.
-
-
7. Lint Roller (Final Touch): Once your hats have dried for about 2 hours, they should be looking much better! You might notice a little bit of lint or things on the hats. For the final step, just grab a lint roller and roll it over the hat. This will get rid of any remaining lint that might have been left over from the towels or the cleaning process, leaving them completely lint-free.
There you have it – these hats should clean up great!
-
B. Wool Hats (Beanies, Fedoras, Berets): Wool requires delicate handling to prevent shrinkage and damage.
-
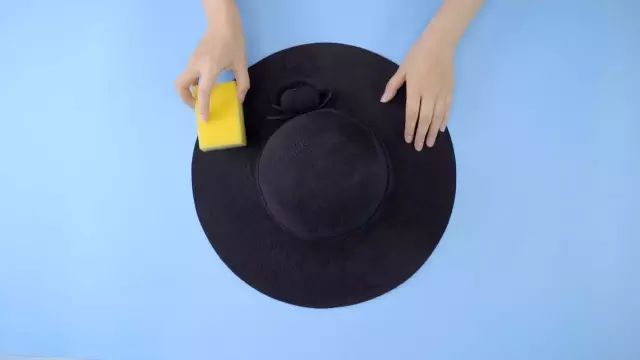
1. Spot Cleaning for Minor Stains: For small blemishes, use a damp cloth and a very mild wool-specific detergent or baby shampoo. Gently blot the stain; do not rub vigorously.
-
2. Gentle Hand Washing for Deeper Cleaning (for most beanies): For knitted wool beanies or balaclavas that need a more thorough clean:
-
Fill a basin with cool water and a wool-specific soap or a tiny amount of baby shampoo.
-
Submerge the hat and gently squeeze it to allow the water and soap to penetrate. Avoid agitating vigorously or stretching the fabric.
-
Rinse thoroughly under cool, running water until no soap remains. Gently press out excess water without twisting.
-
Important: Never wash wool hats in hot water or put them in a dryer, as wool will shrink significantly. For structured wool hats like fedoras, hand washing is typically not advised; stick to spot cleaning or professional cleaning.
-
-
-
C. Delicate & Structured Hats (Straw, Felt, Leather, Silk, Vintage): These hats often require specialized care, and sometimes professional cleaning is the safest option.
-
1. Straw Hats:
-
Cleaning: For general dirt, wrap your finger with a clean cotton cloth, dampen it slightly with water, and gently wipe the hat. If it's dirty, you can use a very mild soap solution, but avoid saturating the straw. Do not put a wet straw hat in a plastic bag as this can lead to mildew.
-
Dust-proof and Anti-deformation: To maintain shape and prevent dust, always hang your straw hat on a coat rack or hat holder, or place it on a hat form when not wearing it. Avoid placing heavy objects on it. When storing for a long time, cover it with a clean cloth or plastic paper.
-
Moisture-proof: After wearing, let your straw hat air out for about 10 minutes to remove any body moisture before storing it.、
-
-
-
-
2. Felt Hats:
-
Brush regularly with a hat brush (a specialty brush designed for felt) to remove dust.
-
For minor stains, spot clean with a very slightly damp cloth and a gentle, pH-neutral soap. Be careful not to over-wet the felt, as it can lose its shape.
-
For more stubborn stains or if the hat gets moldy, it's often best to seek a professional hat cleaner.
-
One traditional method for stubborn felt stains is to use a mixture of equal parts ammonia water and alcohol, applied sparingly to a silk cloth to blot the stain. Always test in an inconspicuous area first, and ensure the hat doesn't get too wet.
-
-
-
-
3. Leather Hats:
-
Wipe down leather hats with a slightly damp cloth to remove surface dirt.
-
For cleaning and conditioning, use products specifically designed for leather goods. These will clean without drying out the leather and will help maintain its suppleness.
-
Never submerge a leather hat in water. Avoid abrasive cleaners or harsh chemicals like gasoline, which can damage the leather permanently.
-
-
4. Silk or Satin Hats: These materials are very delicate. Spot clean only with extreme care using a very mild detergent and a soft cloth. Professional cleaning is often the safest bet for these luxurious materials.
-
5. Vintage Hats: Due to their age and potentially fragile materials, always seek professional cleaning for vintage hats. Attempting to clean them yourself can cause irreversible damage.
-
III. Drying Your Hat Correctly (Crucial for Shape Preservation)
Proper drying is just as important as washing for maintaining your hat's shape and integrity.
-
A. Air Dry is Best:
-
Never use a tumble dryer for hats, as the heat will almost certainly cause shrinkage and damage to the material and structure.
-
Avoid placing hats in direct sunlight or near any heat sources (like radiators or hair dryers), as this can fade colors, warp materials, or cause rapid, uneven shrinkage.
-
-
B. Reshaping is Key:
-
For baseball caps: After gently squeezing out excess water, immediately reshape the cap. You can place it over a round object like a softball, an inverted bowl, or a specialized hat form to help it dry in its original curvature.
-
For felt, wool, or knitted hats: Gently stuff the crown with clean, dry towels or paper (acid-free tissue paper is ideal) to help absorb moisture and maintain its shape as it dries. Lay structured felt hats flat on a clean towel.
-
-
C. Allow Ample Time: Ensure your hat is completely dry before storing it away or wearing it again. Drying can take 24-48 hours, depending on the hat's material and thickness. Storing a damp hat can lead to mildew and an unpleasant odor.
IV. Targeted Stain Removal Tips
For specific types of stains, these methods can be highly effective:
-
A. Sweat Stains: Sweat stains, often appearing as yellow or white rings on the sweatband or brim, are common.
-
Mix a small amount of cool water with a little mild detergent (or a solution of white vinegar and water, 1:1 ratio).
-
Using a soft brush or cloth, gently scrub or blot the stained area.
-
Rinse the area thoroughly with clean water and air dry. For persistent sweatband stains, some people find success with specific "powder stain" removers or by creating a paste with baking soda and water, applying it, letting it dry, then brushing it off.
-
-
B. Oil/Grease Stains:
-
For fresh oil or grease stains, immediately apply a small amount of an absorbent powder like cornstarch or baking soda.
-
Let it sit for several hours (or overnight) to absorb the oil.
-
Brush off the powder. If a residue remains, follow up with gentle spot cleaning using a mild soap and water solution, being careful not to rub the stain further into the fabric.
-
-
C. Mud/Dirt:
-
Allow mud or dirt to dry completely on the hat.
-
Once dry, gently brush off as much of the hardened dirt as possible.
-
Spot clean any remaining residue with a damp cloth and mild soap.
-
Conclusion: Prolonging the Life of Your Favorite Headwear
Cleaning your hats and caps correctly is a simple yet essential practice for extending their lifespan and keeping them looking their best. By following these tips – always checking care labels, choosing the right cleaning method for the material, and ensuring proper drying – you can enjoy your favorite headwear for years to come. Remember, consistency is key; a little regular care goes a long way!
Would you like to dive deeper into specific products for stain removal, or perhaps discuss the best ways to store different types of hats to maintain their shape?